
I mainly use this tool on the sky, to balance out a bright sky with a darker foreground so I mostly use the exposure slider. You have all the other sliders available as well that you do for the adjustment brush (well other than the ones that adjust the brush since you don't need those) so you could easily get a LOT more creative than I do most of the time.
1) This first image, I wanted to add back detail to the sky that I had lost during my editing process (probably from increased contrast, and a little bit of brightness), here is my final edit with the filter applied

20110618-IMG_8653 by MicheleLouise, on Flickr
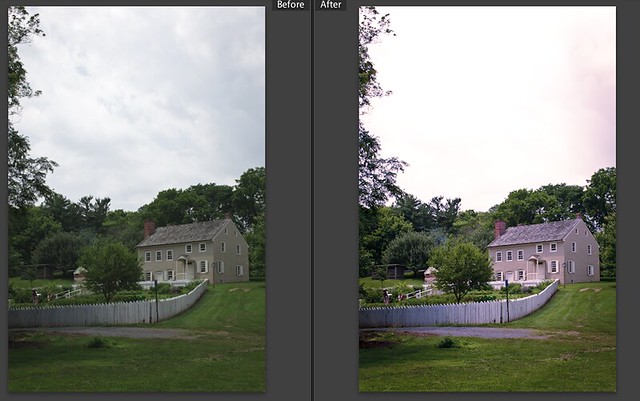
and here is a before/after of just the SOOC, and the edit BEFORE the filter was applied
Link to full size
There was originally more texture in the sky in the SOOC than in my edit, a perfect time to used the exposure slider with the gradient mask to bring down the exposure on the sky and bring back some of that detail instead of having the appearance of a blown out sky.
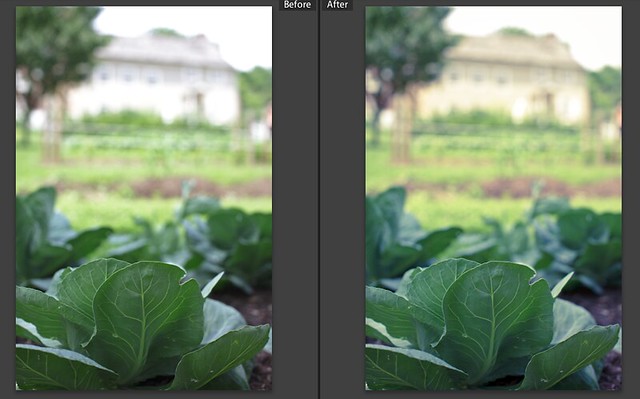
2) This next image is a little different. The cabbage in the front was in the shade and MUCH darker than the house in the background in full sun. On the left is my SOOC and the right is my edit without the filter. To me the house, which I wanted in the background and to be part of the "story" of the image, was too bright and calling too much attention
Link to full size
I added a negative exposure adjustment to the upper part of the image (down to the top of the cabbage) to help balance the two parts of the image, the image below is my final edit with the filter applied.
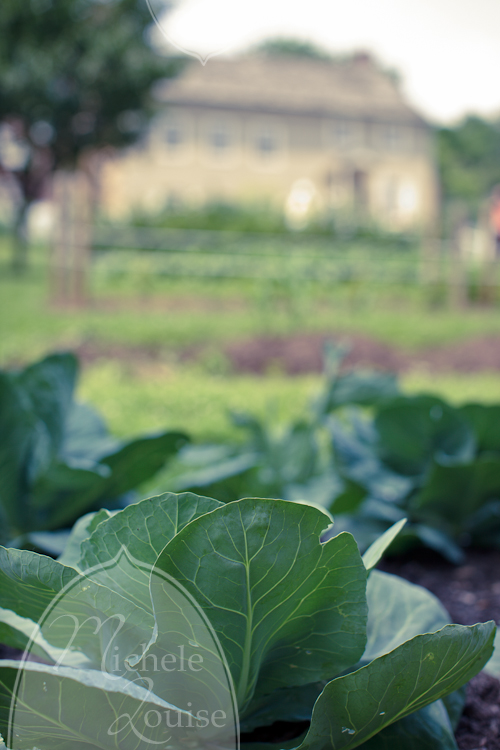
20110618-IMG_8642 by MicheleLouise, on Flickr
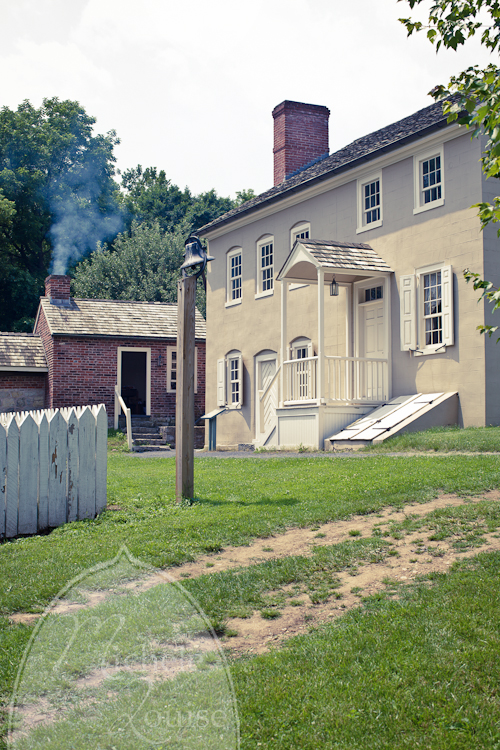
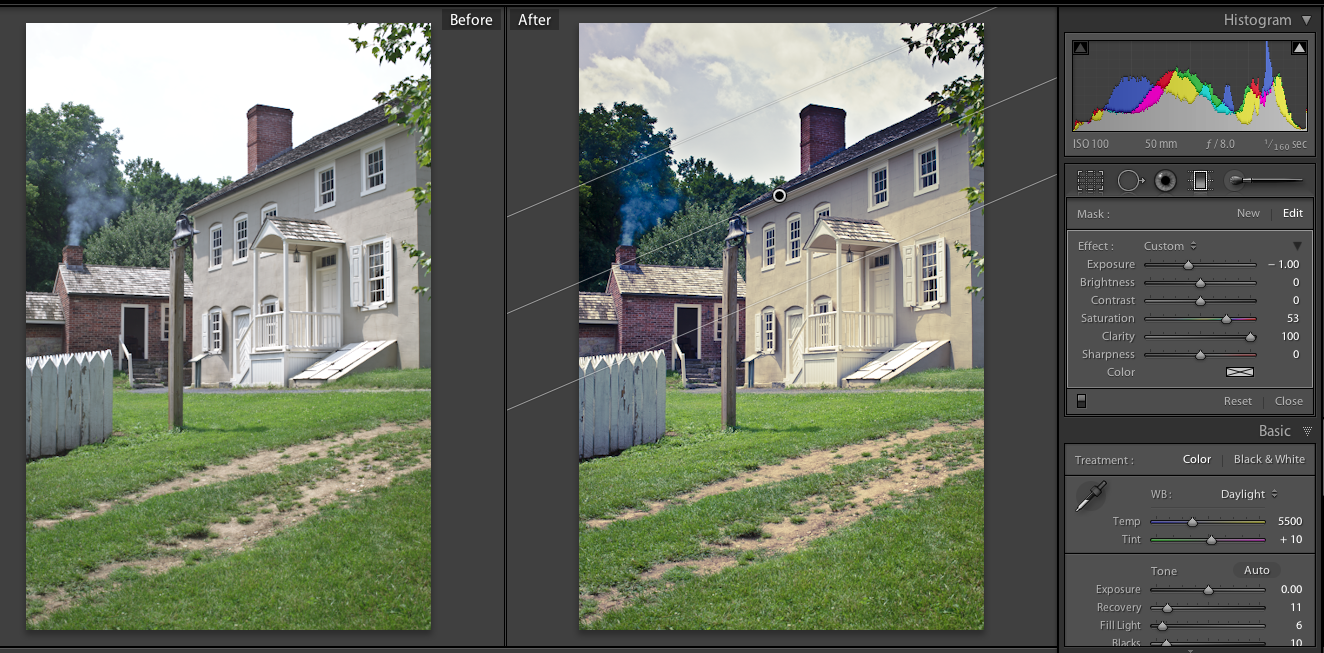
3) This photo I didn't use it on, but could have. Here is the edit that was on my blog:
20110618-IMG_8638 by MicheleLouise, on Flickr
and here is the before after with the filter applied.

link to full size
You can see that you can even put the filter on an angle if you want to, here that was helpful to allow it to blend in more, the roofline of the house was a good natural breaking point. My goal was to add back some texture to the sky that I lost with my other edits, since I knew that information was there in the original file, so I wasn't stuck with a blown sky.
1) This first image, I wanted to add back detail to the sky that I had lost during my editing process (probably from increased contrast, and a little bit of brightness), here is my final edit with the filter applied
20110618-IMG_8653 by MicheleLouise, on Flickr
and here is a before/after of just the SOOC, and the edit BEFORE the filter was applied
Link to full size
There was originally more texture in the sky in the SOOC than in my edit, a perfect time to used the exposure slider with the gradient mask to bring down the exposure on the sky and bring back some of that detail instead of having the appearance of a blown out sky.
2) This next image is a little different. The cabbage in the front was in the shade and MUCH darker than the house in the background in full sun. On the left is my SOOC and the right is my edit without the filter. To me the house, which I wanted in the background and to be part of the "story" of the image, was too bright and calling too much attention
Link to full size
I added a negative exposure adjustment to the upper part of the image (down to the top of the cabbage) to help balance the two parts of the image, the image below is my final edit with the filter applied.
20110618-IMG_8642 by MicheleLouise, on Flickr
3) This photo I didn't use it on, but could have. Here is the edit that was on my blog:
20110618-IMG_8638 by MicheleLouise, on Flickr
and here is the before after with the filter applied.
link to full size
You can see that you can even put the filter on an angle if you want to, here that was helpful to allow it to blend in more, the roofline of the house was a good natural breaking point. My goal was to add back some texture to the sky that I lost with my other edits, since I knew that information was there in the original file, so I wasn't stuck with a blown sky.
1 comment:
Thanks for posting this. I can't wait to try it out.
Post a Comment